Create Source File First
Before using the import wizard, you will have created an export file from your other system, unless your other system is in a data format that can be directly connected without an intermediate table created.
Opening Screen
System Setup - Import Data Wizard
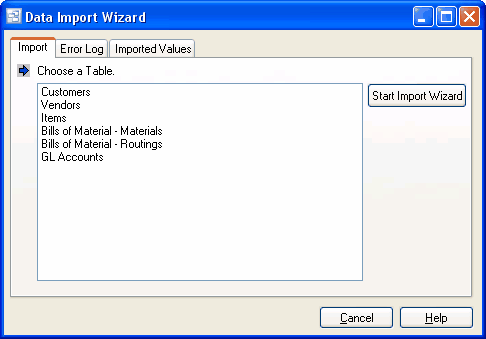
On the opening screen, select the information you wish to import from the Table List, then click the "Start Import Wizard" button.
Step 1 – Select File Format
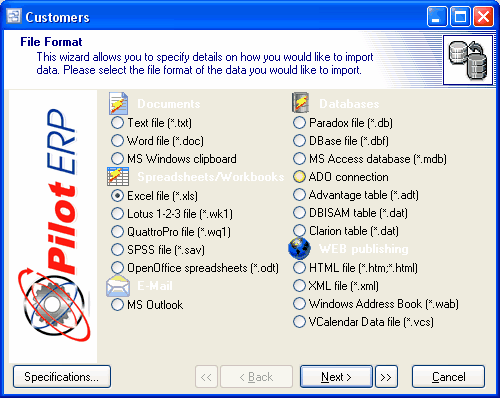
On this screen you will select the file format of the source file from which you are importing. Your choices are as follows:
| • | Text file (*.txt) |
| • | Word file (*.doc) |
| • | MS Windows Clipboard |
| • | Excel file (*.xls) |
| • | Lotus 1-2-3 file (*.wk1) |
| • | QuattroPro file (*.wq1) |
| • | SPSS file (*sav) |
| • | OpenOffice spreadsheets (*odt) |
| • | MS Outlook |
| • | Paradox file (*.db) |
| • | DBase file (*.dbf) |
| • | MS Access database (*.mdb) |
| • | ADO connection |
| • | Advantage table (*adt) |
| • | DBISAM table (*.dat) |
| • | Clarion table (*.dat) |
| • | HTML file (*.htm, *.html) |
| • | XML file (*.xml) |
| • | Windows Address Book (*.wab) |
| • | VCalendar Data File (*.vcs) |
Once your selection is made, click the Next button.
Step 2 – Enter File Source
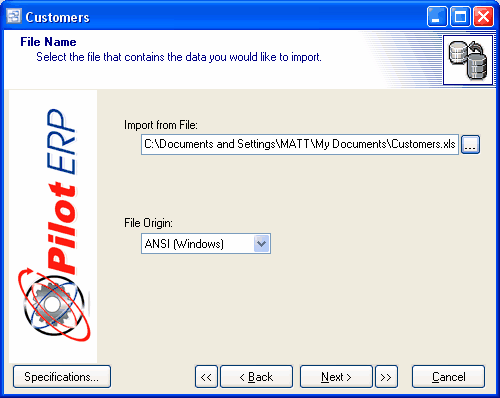
On this screen you will use the Import from File field to enter the path to your source file. You can click the navigation button to the right of the field to navigate to and select your source file.
In the File Origin field, select whether your source file is originating from Windows or DOS.
When your entries are complete, click the Next button.
NUMERIC FIELDS: If the source file is other than Paradox or Dbase, numeric fields should contain only numbers and no spaces. If a space is encountered, the import program will ignore all data to the right of the space.
PARADOX OR DBASE FILES: If you selected Paradox or Dbase files in step 1, the program will skip step 3 and step 4 screens and will take you directly to the step 5 screen.
If You Can’t Find Your File
If you cannot find your file, it may be that you selected the wrong file type in Step 1. Go back to Step 1 and make sure you have selected the correct file type.
Step 3 - Text Settings - Only for Text (*.txt) file import. If you selected another format, the import wizard will skip this step and go to step 4.
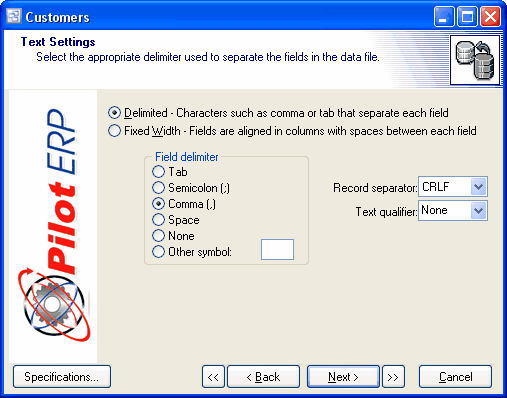
You will only need to use these settings if your source file is in text (*.txt) file format.
First, indicate whether your source file is in Delimited or Fixed Width format.
Delimited means that data fields are separated with a defined character such as a semicolon, comma, space, etc. Fixed Width means that your source file fields have fixed lengths such that each field’s first character can be defined position within the record.
If you selected Delimited, choose one of the following to represent the field separator used in your source file.
Tab
Tab can be used as a separate in Word documents or when Excel spreadsheets are saved as *.txt documents.
Semicolon
Can be used as a separator in a Word document.
Comma
Many systems will produce export files in a comma-separated format. You can also use comma separators with Word documents or when Excel spreadsheets are saved as *.csv documents.
Space
You can use a space to separate words within a Word document (if each word is a separate field) or when Excel spreadsheets are saved as *.pm documents.
None
Can be used when there is only one field to import and no delimiters are required.
Other
You can use any symbol you wish to separate fields. Enter the symbol you wish to use in the field to the right of this option.
In the Record Separator field, chose one of the following to indicate what separates each record in your source file.
| • | CRLF Carriage Return / Line Feed |
| • | CR Carriage Return only |
| • | LF Line Feed only |
Enter a symbol in the Text Qualifier field if non-numeric text fields (such as customer and supplier names) are surrounded by a symbol such as a quotation mark, which is a common format with *.txt files.
Step 4 – Data Formats
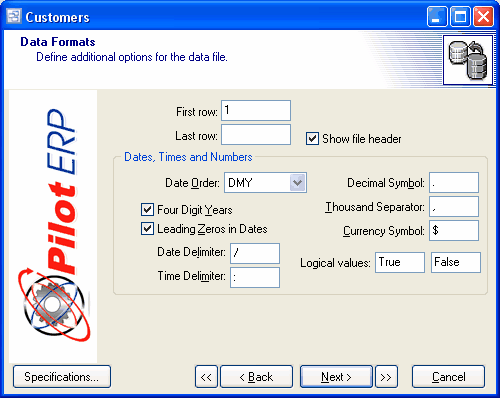
In this screen you can enter additional import parameters.
| • | The First Row tells the program which record should be the first one imported. For example, in a spreadsheet the first row might be used for column headings, in which case you would specify a First Row of “2.” |
| • | The Last Row defines the last record to be imported. It is used if you are deliberately only importing a portion of the source file. This can be useful with spreadsheets, for example, which could contain a quantity of blank lines at the end that should be excluded from the import process. |
| • | Select the Date Order in which dates are stored in your source file, as well as whether your dates are stored in Four Digit Years, or clear the checkbox if they are stored in 2-digit format. If your dates contain leading zeros (meaning the seventh of the month is stored as “07”), select the Leading Zeros in Dates checkbox. |
| • | Enter your source file’s Date Delimiter (typically a “/” or a “-“) and Time Delimiter (typically a “:”). |
| • | Enter your source file’s Decimal Symbol, which is typically a period. If your other system stores long numbers with separators, typically commas, enter a Thousand Separator. This is not a common practice, so normally the Thousand Separator is left blank. |
| • | Enter your Currency Symbol. You can leave the Logical Values field blank because it is of no relevance to the system. |
Columns
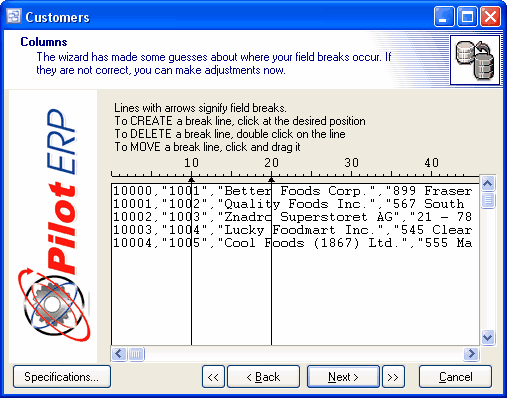
This screen only displays if you had selected Fixed Width during step 3.
The program looks at your source file and attempts to discern the fixed width position of the fields, which are marked by a vertical break line against your data. If needed, you can make adjustments to these settings as follows:
| • | To insert a new break line, locate your cursor at the insertion position and make one click. |
| • | To delete a break line, double-click on it. |
| • | To move a break line, click on it and drag it to the new position. |
Step 5 – File Preview
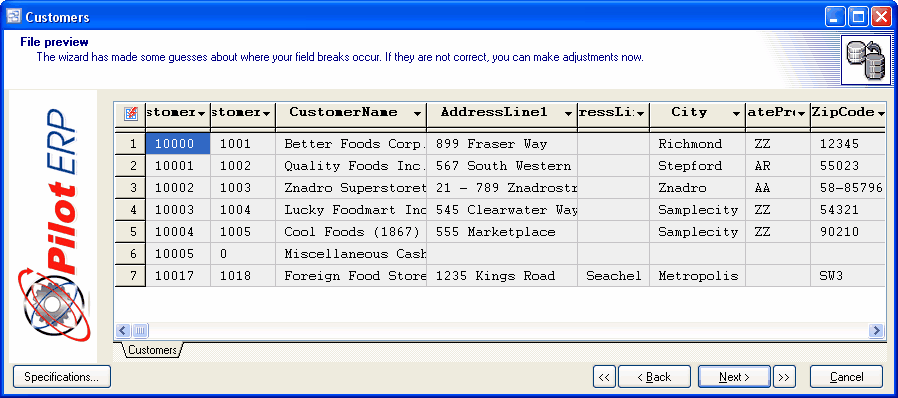
The file preview will show you the data from your import source.
This screen is where you match up each field in the source file with its corresponding field in this system.
To do so, click on each column heading and you will be presented with a list of all the fields in the target table in this system. Select the appropriate field and its field name will be inserted into the column heading.
NOTE: If you click the Auto-Map button in the upper right hand corner of the preview grid, the Pilot Import Wizard will attempt to match the fields. You can modify these selections after running the auto map feature.
Step 6 – Mappings
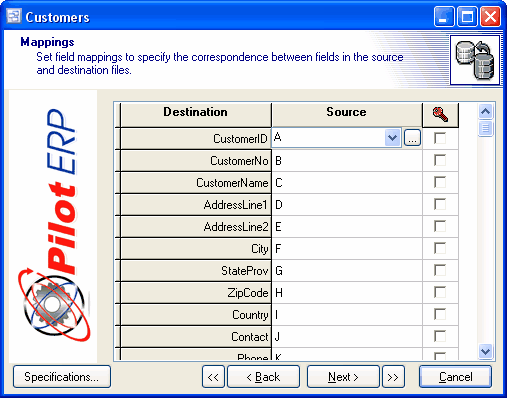
This screen presents the matched fields side-by-side in a vertical format. You can reassign fields in the Source column by clicking the down arrow and selecting another source file field, if you wish.
Updating Key Fields
Data import is not just for importing data on a one-time basis. If you want to refresh selected data fields on a regular basis from an outside source, such as a Contact Manager, you can flag the appropriate fields for updating by selecting each such field’s Key checkbox on this screen.
Step 7 - Data Preview
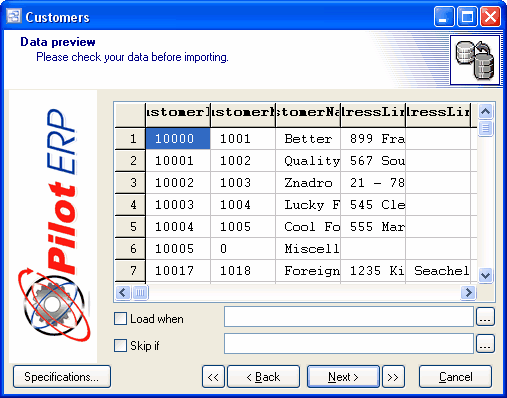
This screen displays your data under the matched column headings and gives you an opportunity for a final review before importing takes place. You can also use the options to "Load When" and "Skip If" to perform conditional import of your data.
Saving Specifications for Future Use
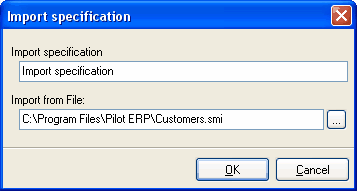
You can save your import settings so that they can be used again without having to go through all the setup steps each time. To do so, click the Specifications button at lower left. A screen will appear containing a list of all your saved import specifications. Click the Save button and you can enter a name for this set of specifications as well as a path to the source file. When done, click OK and the name will be added to the list of available specifications.
Step 8 - Data Import
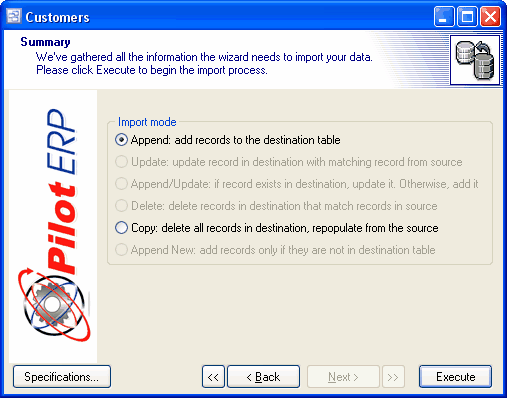
Use this screen to actually import the data. Your final step is to select an Import Mode from among the following options:
Append
This option adds records to the target table. The only time you should use this is when the target table is completely empty and you are importing for the first time.
Update
If you highlighted a “key” field in step 7, then this option is activated. The existing target table records will be updated by the import in the key field only. No new records will be added.
Append/Update
If you highlighted a “key” field in step 7, then this option is activated. The existing target table records will be updated by the import in the key field only, and if any new records exist in the source table, they will be added to the target table and will include all the fields.
Delete
If you highlighted a “key” field in step 7, then this option is activated. This will delete any record in the dataset whose key currently matches the import record’s key.
CAUTION: In general, the Delete function should only be used with supplier catalog tables in the event that catalog items become obsolete and are to be removed from the catalog. Do not use the Delete funciton with other system tables because many tables are linked with other tables, which makes deleting records dangerous if not done properly.
Copy
This option deletes all records from the target table and imports a completely fresh set of records.
Once you’ve made your selection, click the Execute button to begin the import. When completed, you will receive a message indicating that the operation was successful.
Re-Importing Using Saved Specs
To re-import using saved specs, select the Import option on the opening screen, highlight the table you wish to import into, then click the Import button.
On the next screen, click the Specifications button in the lower left portion of the opening screen. Highlight the item you want in the list of available specifications window, then click the Load button. This will load all your saved settings into the import wizard screens.
You can now cycle through the screens and change any settings you wish. When done, click the Execute button on the last screen to run the import routine.
Exercise Caution with Delimiters
If your source file is in a *.txt format using delimiters such as commas to separate the fields, make sure that the delimiter you are using is not used within the data itself. Otherwise the import wizard will falsely identify data as delimiters and will import data into the wrong fields.
If you are using commas (,) as separators, commas can be within a data field as long as the field is bracketed on both sides by quote marks (“…”). Most export programs will create text files in this manner for you.