Pilot ERP requires Windows 95, 98, Me, NT, 2000, 2003, XP, Vista, 2008 Server, Windows 7 or a 100% compatible operating system, a 1Ghz or better processor, and 500Mb of system memory. At least 10MB of disk space is required for program files.
To start the installation, run PilotERP.exe.
For best performance, users of Norton Antivirus should either disable monitoring of the database folder(s) and "Priv" folder (created in the program folder for temporary database files) or disable monitoring of the database files (extensions .dat .idx and .blb).
Follow the steps below to configure your Norton Anti-Virus settings for use with Pilot ERP on the server and on the clients :
1. Open Norton AntiVirus.
2. In the Norton AntiVirus main Window, in the left pane, click Configure.
3. In the right pane, click File System Realtime Protection.
4. In the File Types group box click Selected extensions to instruct Norton to scan only those files that match the listed file extensions. Then click Extensions to change the default list of file extensions.
5. Remove DAT, IBX, and BLB extension types.
6. Un-check the “Network” check box at the bottom of the File System Realtime Protection screen.
7. Under the Options group box area, select "Exclude selected files and folders". Then in the subsequent dialog, select the option to "Check file for exclusion before scanning". This is known as a "prescan exclusion".
8. Click on the Extensions button. The list of excluded extensions should include DAT, IBX, and BLB.
9. Click OK to save your settings.
Network Installation (Peer-to-Peer & Client Server)
| 1. | First install the program on the Server or Central Workstation. |
| 2. | Share the Pilot ERP program folder. |
| 3. | From the Client(s), map a network drive to the shared Pilot ERP folder on the server/central workstation. |
| 4. | Create a shortcut to the program executable file "Pilot.exe". |
Remember to set appropriate file sharing options.
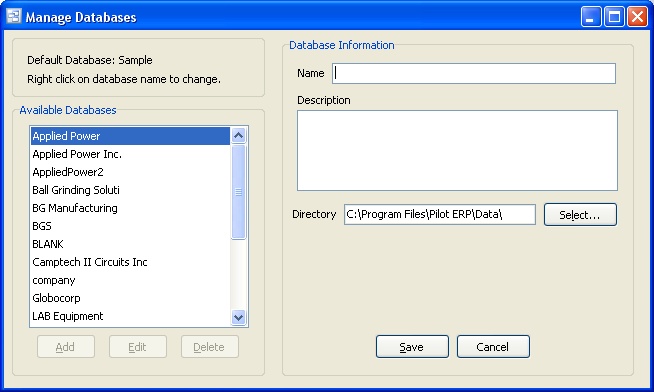
Multi-company Installation
You can set up as many companies as you wish via menu File | Companies | New Company. You can use the Select button to select an existing empty directory/folder or you can type the path of a new or existing directory/folder. If creating company databases on a network server, please see notes above.
After you have created one or more company databases, then each time you launch the program it starts in the last company worked on. You can then select a different company from the menu if desired.
To set one company as the Default login company, simply right click on the company name and select "Default".