System Setup | Your Company
This screen is for entering info related to your company, such as the name of your company, current fiscal year and preferences.
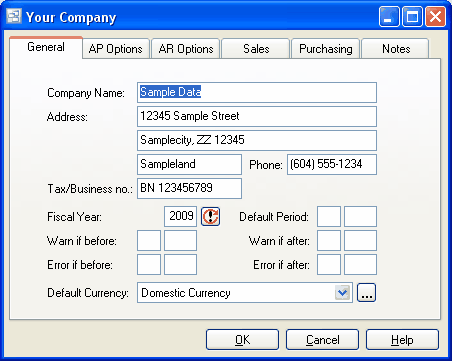
General
Company Name
Your company name. This prints on AR invoices, some reports, and displays on the Pilot Launch Pad (top left) if menu View | Company Name is selected.
Address
The address of your company. This prints on AR invoices.
Phone
The phone number of your company. This prints on AR invoices.
Tax no./Business no.
Some jurisdictions require that your tax number or business number is printed on your AR invoices, such as GST Registration no. in Canada. If so enter it here along with the title as it should appear on the invoice.
Example 1: GST Registration Number: R123456789
Example 2: BN 123456789
Fiscal Year
Your current fiscal year. This is the calendar year of your last fiscal period.
Example: If your current fiscal year ends December 1997 then your current fiscal year is 1997, and period 01 is January 1997.
Example: If your current fiscal year ends in March 1998 then your current fiscal year is 1998, and period 01 is April 1997.
After entering transactions (invoices, etc.) you can only change the fiscal year by clicking the Year-End button.
Default Period
Here you can set the default period for new transactions. If you use this optional feature the system will display this on new invoices, etc. as the default. Otherwise the period defaults to the current calendar month. If your fiscal year doesn’t end in December or your fiscal periods are not calendar months, you should set the default period regularly to help prevent data entry errors.
Example: 11 1997
Warn if before… or after
Pilot ERP will allow transactions to any period in the current fiscal year or beyond. To prevent accidentally entering data to the wrong period, you can specify a range of periods so that the system can warn you if you enter a period outside this range. If you use this optional feature, you will typically change the range at the start of each period.
Example: 02 1998 03 1998
Error if before… or after
Pilot ERP will allow transactions to any period in the current fiscal year or beyond. To prevent accidentally entering data to the wrong period, you can restrict the range of periods allowed by the system. If you use this optional feature, you will typically change the range at the start of each period.
Example: 01 1998 03 1998
Default Currency
Select the currency of your main bank account. If you need to add a new currency to the drop down list, click the “3 dots” button. When setting up vendors and customers you specify the currency, thereby setting the currency for their invoices. If you specify the default currency here, this information will be entered automatically. For more info on multi-currency operation see Multi-currency Overview.
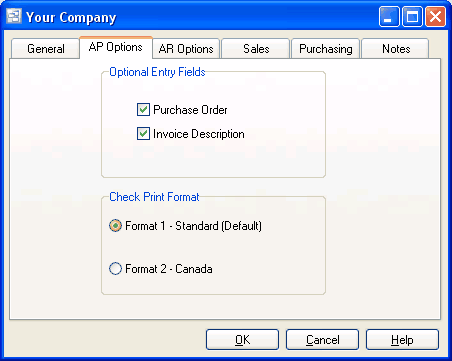
AP Options
Optional Entry Fields “Purchase Order” and “Invoice Description”
Select whether these fields are to display on the AP invoice screen. If you do not want to record these fields when entering new invoices, you can uncheck them here to simplify the AP invoice screen.
Select the format of the check you wish to print. Checks can be ordered on-line through our website or by searching for Quickbooks™ compatible checks with your preferred business forms provider.
Format 1 is designed for all US and foreign companies except Canada.
Format 2 is designed specifically to accommodate the CPA standards.
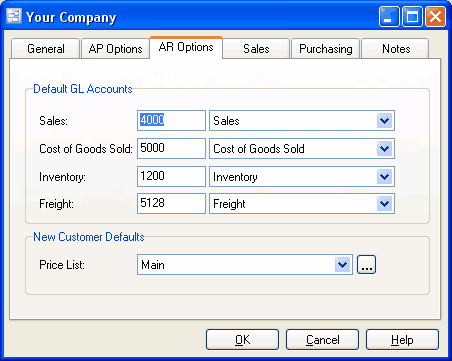
AR Options
Default GL Accounts: Sales, Cost of Goods Sold, Inventory
Select the GL accounts to be used as defaults when setting up new items. If you need to add a new GL account to the drop down list, click the “3 dots” button. When setting up items (or services) for sale you specify the GL accounts to be used for each item. If you specify default accounts here, this information will be entered automatically.
New Customer Defaults
Price List
Select the price list to be used as the default when setting up new customers. If you need to add a price list to the drop down list, click the adjacent button.
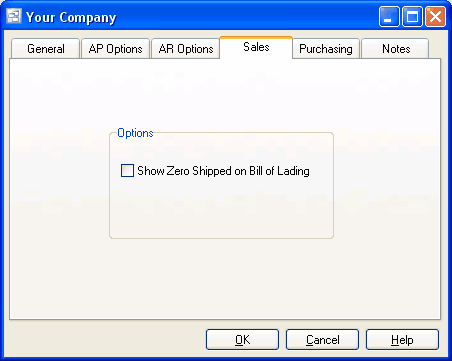
Sales
"Show Zero Shipped on Bill of Lading"
Check this option if you wish to show ALL items from a sales order on the Bill of Lading. This will show a 0 qty for line items that did not ship. If not checked, only the items that shipped will show on the Bill of Lading.
Purchasing
"Use approved Vendors only"
Check this option of you wish to only allow purchases from approved vendors set up through the Vendor Items. If not checked, you will be able to purchase from all inventory items. Users will still have the capability to add or edit Vendor Items.

Notes
Notes
Enter any notes you wish to record here. Right-click to toggle Word Wrap.