Inventory | Adjustments
The inventory adjustments screen displays adjustments in a list showing summary info including period, adjustment date, description, and warehouse.
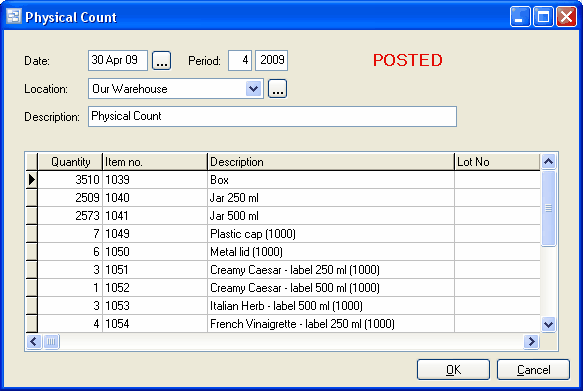
Adjustments are entered to record warehouse transfers, and reduction of inventory due to spoilage/breakage, theft and samples, etc. Also physical count corrections may be entered directly as adjustments or the physical count may be entered via the Physical Count feature, which prints count sheets, allows entry of the physical count, prints variance reports, and generates adjustment transactions.
To add a new adjustment: click the New button.
To edit an adjustment: double-click the adjustment. Or select the adjustment and press Enter or click the Edit button.
To delete an adjustment: select the adjustment and click the Delete button.
You can select an adjustment with the mouse or by the keyboard via the Page Up/Down and arrow keys.
The menu has options to
| • | refresh the data displayed to show changes entered by other users, etc. |
| • | print the list |
| • | post adjustments (see notes following) |
Inventory adjustments are entered, then posted. Prior to posting, they may be edited or deleted. To undo an adjustment after posting, you must “reverse” it (enter it again with the opposite amount). Posting updates inventory totals and history. To post adjustments use menu Records | Post or choose the Post option when closing the adjustments screen.
Adjustment Date
The adjustment date defaults to today’s date.
Tip: You can use the + or - keys to increase or decrease the date, or click the 3-dots button to select the date from a calendar.
Period
This is the fiscal period and year of the adjustment. This defaults to the current calendar month, or the default period on Your Company if specified there. If your fiscal year doesn’t end in December or your fiscal periods are not calendar months, you should set the default period regularly to help prevent data entry errors. Note: The year is entered as 2 digits and displayed as 4.
Example: 11 2001 entered as 11 01
Warehouse
Select the warehouse where the item quantities are to be adjusted. If you need to add a new warehouse to the drop down list, click the “3 dots” button.
Tip: You can enter a few characters of the warehouse name, then use the down or up arrow keys if required.
Description
Enter a description for the adjustment. This will show on the inventory history and the Perpetual Inventory reports.
Example: Samples
Items and Quantities
Enter the adjustment quantity for each item. A positive quantity will increase the item quantity on hand, and a negative quantity will decrease it.
Tip: You can display a pop-up menu with options for New (line) and Delete (line) by right-clicking on the grid.
Item numbers or descriptions are not entered directly on the adjustment screen, but instead selected on a pop-up screen which displays if you type into the item number or description column, or by clicking on the “3 dots” button in the column, double-clicking in the column, or by the keyboard shortcut Ctrl+Enter.
On the Item pop-up screen: you can select the item by typing the item number in the 1st entry box or by typing the description in the 2nd box, or by selecting the item with the mouse or up/down arrow keys. Click on the selected item or press Enter when the selected item is highlighted. Or Esc to leave a previously entered item unchanged.
Typing the item number in the 1st entry box sorts the list by number and selects the first item number matching the characters entered.
Typing the item description in the 2nd entry box sorts the list by description and selects the first item description matching the characters entered.
On the Item pop-up screen you can select Item Type via the combobox at the right, so that only items of the selected type show. To deselect an item type and show all types, press Delete.