Located under the Purchasing | Vendors Menu.
The Vendors screen displays vendors in a list showing basic contact info and amount owed.
To add a new vendor: click the New button. Or New Vendor on left sidebar.
To edit a vendor: double-click the vendor. Or select the vendor and press Enter.
To delete a vendor: select the vendor and click the Delete button.
You can select a vendor with the mouse or by the keyboard via the Page Up/Down and arrow keys. Or click the Find button, then enter the vendor no. or select the vendor name from the drop down list. Tip: You can enter the 1st letters of the vendor name then press the down arrow.
The menu has options to
| • | sort the list by vendor no. or name |
| • | display invoices for a selected vendor |
| • | display Checks for a selected vendor |
| • | refresh the data displayed to show changes entered by other users, etc. |
| • | print the list |
Tip: To display invoices or Checks for a vendor, phone, or send e-mail (via your e-mail program): select the vendor, then right-click to display a pop-up menu.
Vendor no.
Vendors can be accessed by number or name. Vendor no. is useful if you have multiple vendors with the same name, such as branches of the same company, or a large number of vendors. When setting up a new vendor, the program assigns a default vendor number which you can then change if desired. At any time you can change the vendor number and any history (invoices, Checks, etc.) will automatically still be linked to the vendor.
Suspended
Check here to prevent further invoices from being entered for this vendor.
Name
Vendor’s name.
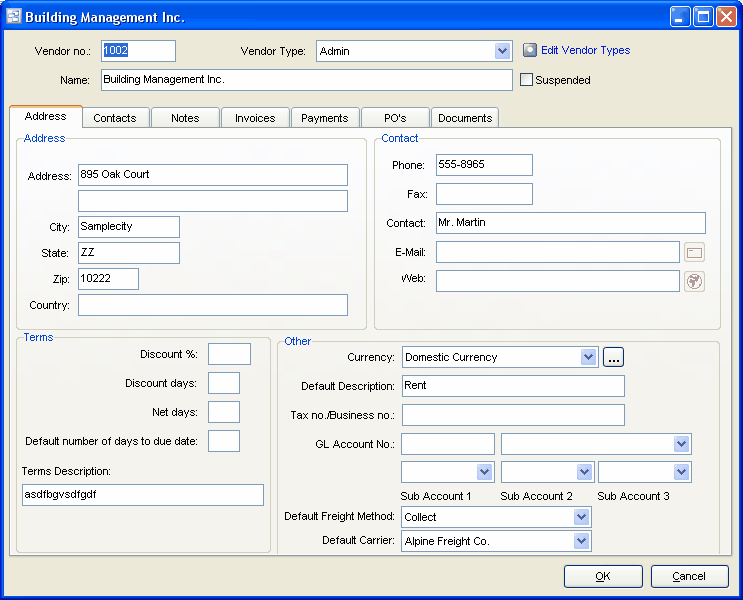
Address
Vendor’s address.
Phone
Main phone number. Additional phone numbers can be specified on the Contacts tab. You can phone the vendor by clicking the phone button or by right-clicking on the vendors, invoices, or Checks screens.
Fax
Main fax number. Additional fax numbers can be specified on the Contacts tab.
Contact
Main contact’s name. Additional info and contacts can be specified on the Contacts tab.
Main e-mail address. E-mail addresses for other contacts can be specified on the Contacts tab. You can send e-mail (via your e-mail program) to the vendor by clicking the e-mail button or by right-clicking on the vendors, invoices, or Checks screens.
Web Page
URL of vendor’s web page. You can connect to this page (via your web browser) by clicking the adjacent browser button.
Discount %
Default discount %. When entering new invoices this displays as the initial discount %. The discount amount on an invoice is calculated using the discount % rather than keyed directly.
Example: 2 2%
Discount days
Default number of days from invoice date to discount date. When entering invoices the system uses this to calculate the default discount date, which you can then change if required. When paying invoices the check date is compared to the discount date to determine whether the discount can be taken.
Example: 10 If invoice date is 5th May, then default discount date is 15th May.
Net days
This is the vendor’s requested terms and is used for informational purposes only.
Example: 30 Net 30 days.
Default number of days to due date
Default number of days from invoice date to due date. When entering invoices the system uses this to calculate the default due date, which you can then change if required. When paying invoices the optional AutoCreate New Checks feature uses due date to determine which invoices to pay.
Example: 25 If invoice date is 5th May, then default due date is 30th May.
Terms Description
If a description is entered, this prints on the purchase orders and quotes as the terms. If nothing is entered into the description, the system generated terms display based on the terms settings
Currency
Select the currency of this vendor’s invoices. If you need to add a new currency to the drop down list, click the “3 dots” button. On new vendors this defaults to the default currency on Your Company.
Vendor Type
Select the Vendor Type for this vendor, if desired, or press Delete to remove a previous selection. If you need to add a new type to the drop down list, click the adjacent button. Vendor Types are used to group vendors. Example: Inventory, Shipping, Admin, etc. This facilitates selecting vendors using the vendor search, and printing reports sorted and/or summarized by vendor type.
Default Description
Default invoice description. When entering new invoices this displays as the initial invoice description. If you do not want to record invoice descriptions you can suppress this field via Your Company preferences.
Tax no./Business no.
Some jurisdictions require that you store the vendor’s tax number or business number, such as GST Registration no. in Canada. This is used for informational purposes only.
Default Freight Method
Select the default Freight method for this vendor. The freight method will automatically copy to all new Purchase Quotes and Orders for this vendor. You may change the freight method on the PO and Quote.
Default Carrier
Select the default Carrier for this vendor. The carrier selected here will automatically copy to all new Purchase Quotes and Orders for this vendor. You may change the freight method on the PO and Quote.
GL Account No.
Select the default GL Account Number and Sub Account Numbers (if applicable) for this vendor. The default GL Account number will automatically be used in all new AP Invoices for this vendor. You will be able to change the GL Account number when entering the AP Invoice.
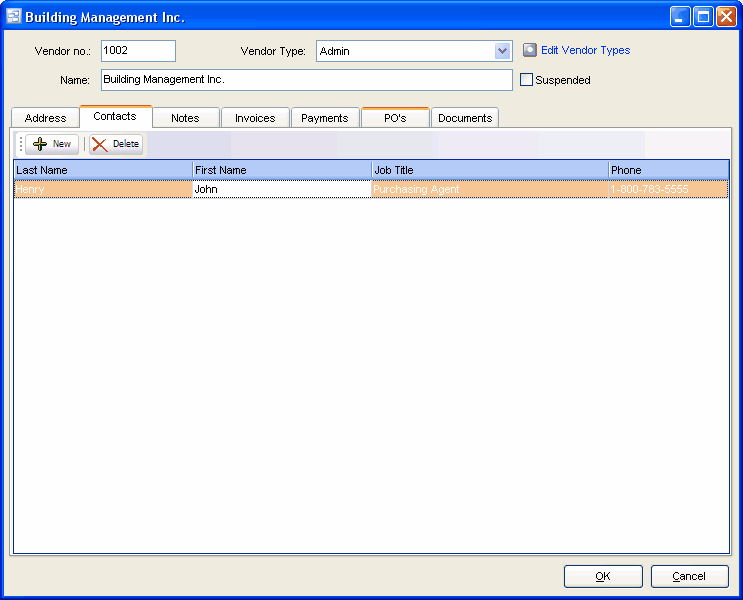
Contacts
Use the New, Edit, and Delete buttons to add, modify, and delete contacts for this vendor. Right-click on a contact to make a phone call or send e-mail (via your e-mail program).
Notes
Enter any notes you wish to record here. Right-click to toggle Word Wrap.
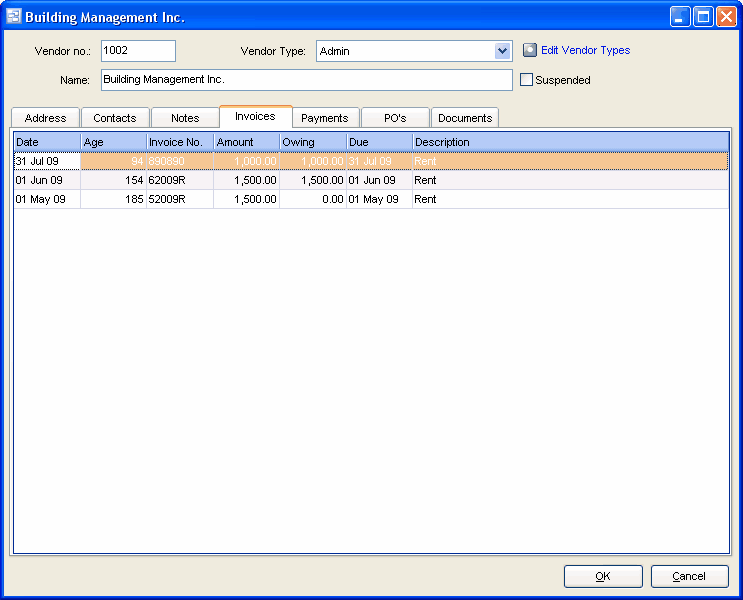
Invoices
Posted Invoices for the Vendor display here. Double click to view the invoice.
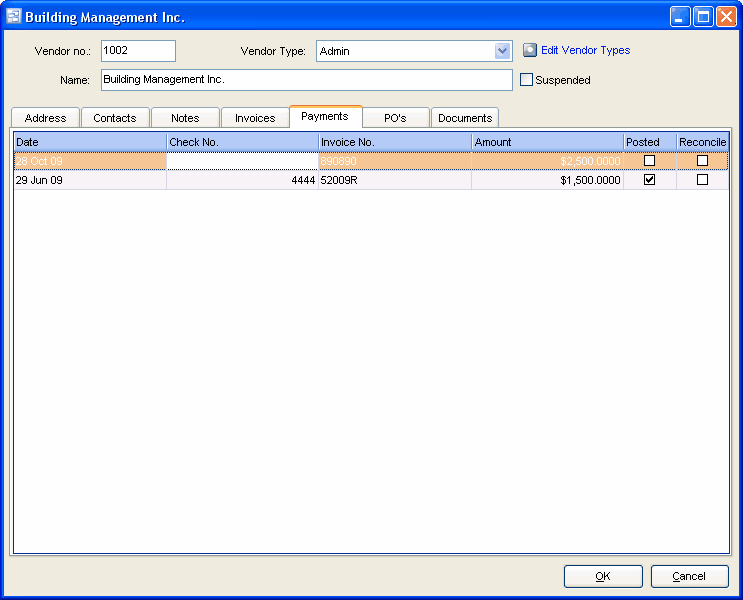
Payments
View any check or payment to this vendor through the Payments tab.
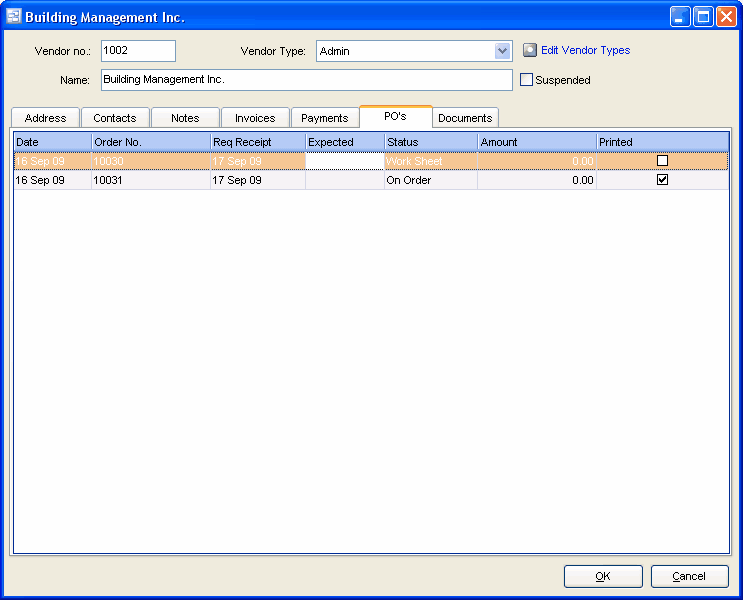
PO's
View all Purchase Orders for this Vendor through the PO's tab.
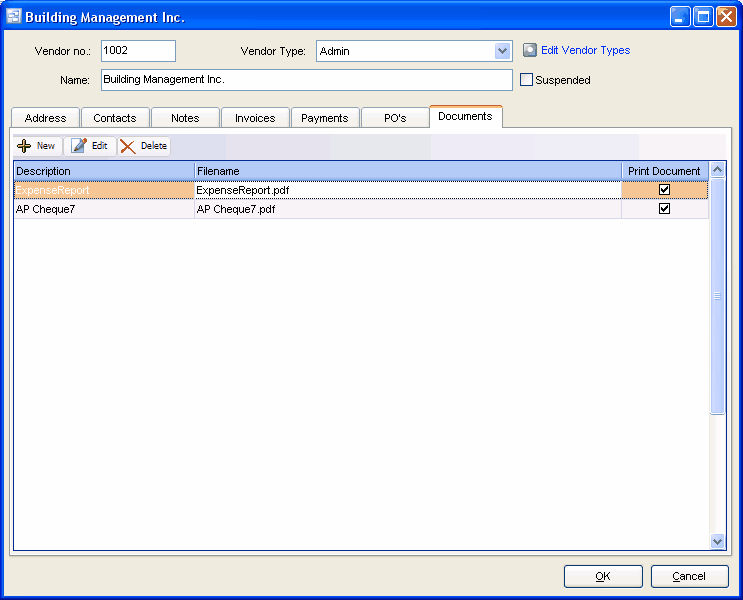
Documents
Attach documents, images and any other file that pertains to the Vendor. There is a "Print Document" option available if you want the document or image to automatically print with an associated Purchase Order.
This also allows purchasing and accounting to organize documents related to vendors directly through pilot and allow them to quickly find and view this information.